CD Lamp 1

|
|
CD Lamp 1
|
|
Also see CD Lamp 2 and CD Lamp 3, they uses a duel tube fluorescent bulb and runs off AC.
|
|
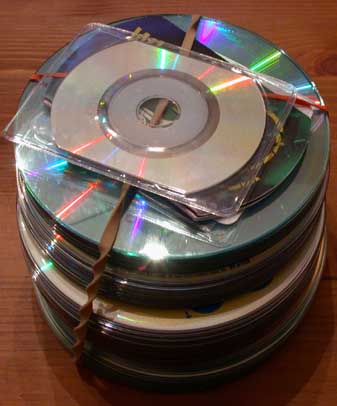
In the mean time I started collecting old CDs. Any time I burnt a coaster with my CD writer, or AOL or another company sent me a CD I did not want I put it into a box. In about 3 years I ended up with about 70 CDs.
|
|
|
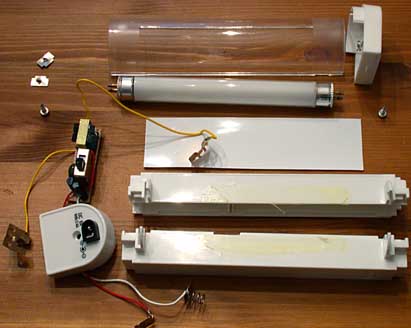
At Canadian Tire I found this battery operated utility light that looked the exact diameter and length. And as a bonus, it is battery operated with a jack for a 6V DC adapter. 6" long with twin connections at each end. part # 52-5724-4 from Canadian Tire for $14.69 There is also a 12" version for $17.79
|
|
|
Here it is out of the container off and on. I am using an adapter to power it here. Using batteries it is about 2/3 the brightness :-( They were a little old so new batteries should be better.
|
|
|
Next step. Taking the light apart to see what was inside and what I
got.
|
|
|
Dry fit of the CDs over the fluorescent bulb indicated that it is just a little bit too big. Goes over the electronic prong but not the bulb itself. I will have to make the hole bigger. I was hoping to avoid that!
|
|
|
This is the center of a CD before it is enlarged.
|
|
|
To enlarge the hole on the CD I used a tapered grinding bit. Placed CDs on a piece of Styrofoam to prevent scratching. The drill press made this fairly easily. The tapered grinding bit would self center the hole which also helped the process.
|
|
|
Grind a little bit on one side then flip it over and grind a little bit on the other side. Every CD seamed to be made of a different quality or type of plastic. Some would melt more than grind away. It just meant using a little less pressure and some more time. After it looked right I would test each one on the bulb to make sure it would fit.
|
|
|
This is the center of a CD after it is enlarged. Only a small difference.
|
|
|
After enlarging the center I had to make another hole for a wire to connect to the top of the bulb. I made a jig for the drill press to do this.
|
|
|
I wanted the hole the same distance from the center each time. To create the jig I drilled a 1/4" hole all the way through a board. then drilled another one larger to an exact depth so that enough of the grinding bit poked out to align the CDs.
|
|
|
After the CDs were done on the drill press I cleaned then off. Rubbing alcohol was good to get rid of on permanent marker I put on the CDs to indicate they were bad. I was hoping I had enough CDs to glue the printed side snug together, and leave the shiny sides a CD thickness apart. I needed another 30 or more to do that. I put the wire I am using to connect the top of the bulb through the little hole and placed the CD on the bulb one at a time as I glued them. All the CDs have the printed side down. I glued the CDs together using clear hot glue. I used three small business size CDs as spacers. You have to wait a little bit (20 sec) to let the glue harden before adding the next. If the glue is only partly cooled, adding more hot glue above it was sometimes enough to soften it a bit and make that layer squish together a little too much. Cation: do not use too much pressure. I also noticed that some times that although I had
the spacers in place, I squished the inside together too much, and gave the CD
a little concave effect, until the spacers were removed, then they snapped
down, too close.
|
|
|
The battery case was removed from the rest of the case and glued back together with model glue. I soldered some longer wires to connect to the battery case.
|
|
|
The base I made out of 3 pieces of 3 ply plywood each 3/8". Total thickness 1 & 1/8". I needed at least 1" for the batter container. Cut into a circle the size of a CD with jig saw and sanded smooth by drilling a hole in center, and putting a bolt through and attaching it to the drill press while I held sand paper up next to it. (Don't have a lathe). I used the drill press and some chisels and files to create the compartments I needed to store the batteries and electronics.
|
|
|
While filings the hole big enough to fit the switch through, I accidentally broke it, but this meant that I did not have to go any bigger. I can put everything in, and glue the wood back in place. But before everything is glued in make sure everything works.
|
|
|
To make it easy to change the bulb in the future I made the top come off the base by screwing in three screws part way into the top of the base. Making three matching holes in the bottom three CDs It might have been possible to use the supplied Velcro for this job.
|
|
|
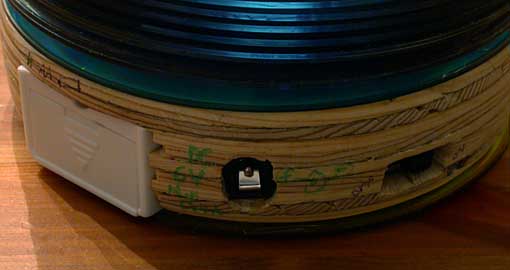
I had to remove a little of the bottom CD so that the battery compartment could
open. The switch is indented, but the hole is large enough to use
easily. |
|
|
The bottom CD is attached by 3 screws just in case someone needs to get at
the electronics. I saved one gold disk for the top and bottom. |
|
|
Finished and all lit up. I would not use exposed plywood on many projects but it works with the CDs. |
|
|
Find either a bulb that would fit inside the CD without altering the size of the
hole.
Or use a quad
tube bulb, so that there is no connection at the top, thus the top can
be illuminated, will need to make the hole bigger anyway. The quad tube
would also be brighter.
Run directly on AC instead of needing to use an AC to DC adapter.
My second CD Lamp that uses a duel tube fluorescent bulb and runs off AC.
My third CD Lamp with CD arranged in the pattern of piano keys.
Boernson's CD - Lampen in German, and CD - Lamp translated into English with Google
Kurt Schuster's Terabyte standing lamp
Geometric Sculptures including several using CDs
Dmoz list of links to more pages on things to do with AOL discs
|
Page last modified Dec 27, 2014 |