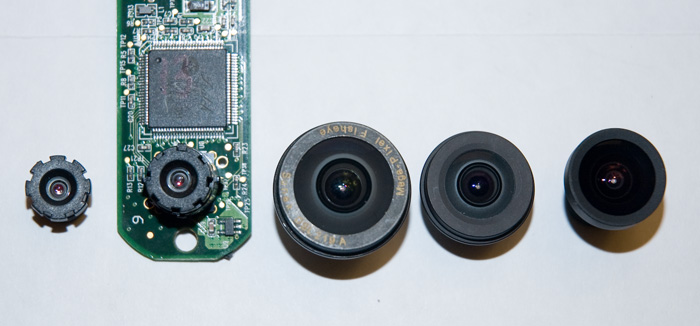
Camera setup for shooting VR or Immersive Video

In the Beginning

This project started because my friend Denis thought I was taking too long to render my panoramic movie I shoot in March 2006 but did not finish until Dec 2008.

Immersive Video is like Google street view.  Two companies that provide end to end solutions are Grey point and Immersive Media.  These setups start at many thousands of dollars.
 - Grey Point with LadyBug2 and LadyBug3
 - Immersive Media with DODECA 2460 System

The first version of the camera setup Denis created had 10 Logitech Fusion web Cameras in a circle going to two USB hubs recording 15 frames per second jpg compressed images.  The Video camera with a fisheye adapter filled in the nadir.  There was a limit of 10 web cams that the computer was able to enumerate at one time.


A single set stitched together in low light. 
 

Rendered to a VR Video
The parallax errors of having the cameras spaced far apart and having the video camera a significant distant from the web cams is evident.


Create a Better Camera Setup

In early 2009 I started working on a new arrangement for the cameras to lessen the parallax errors.

Logitech Fusion Web Camera

Logitech Fusion Camera were first stripped of excess plastic

I measured the cameras and created some mock ups in Google Sketchup.

Arranged with 8 around vertically, one straight down, plus 5 more horizontal at about 48° down. 
The cameras have Field of Views of 51° X 64.5°
Resulting panorama has a field of view going 32° above the horizon 
With 14 web cams it will require two systems to control all the cameras.


Mock up using an end cap for 2 inch PVC pipe. The inside diameter of the cap is just over 2 inches.
There are slight physical differences between the cameras.  This required making each hole a little different for each camera.  The camera overlap each other slightly.  I Will be able to get the last camera in by opening it at the top and sliding it in so it can weave in behind the first camera added.   This is about as close as the lenses can be to each other in this arrangement.
   
 
If the existing lens is replaced with a wider lens then it will be possible to use fewer cameras.
          

A slightly smaller piece of ABS might be better. Still Need to add the camera to the bottom. For this camera we will use one of the Logitech Orb Web cams.
     

Next step is to find a wider angle lens that will work with the Fusions.  The lens mount thread on the Fusion is 10mm.  Most replacement lenses for web cams are 12mm.
Even the lWLAL 120 lens from Logitech is M12.  The website does claims it will only work with their Video Security Systems cameras.


May 2009

I ordered five M12 fisheye lenses hoping I will be able to modify the thread to make it small enough to use the existing M10 mount.  Each of the five are different.  I want to compare them to find the best choice.  The first three arrived and it is evident it will not be possible to use a tap and die to make it fit the M10 of the camera.  The mounts will need to be replaced. 

Original lens
Circuit board and original lens 
DSL219A from Sunex
DSL209A from Sunex
lWLAL 120 lens from Logitech


This site has a list of web cams that use M12 mount. These cameras are fairly old.  The mount is easily removed from the Fusion circuit board by applying some heat to the plastic tabs on the bottom side using a soldering iron.  There are two wholes on the circuit board that a M12 mount may be able to attach to.  But I was not able to locate any mount with that layout.  


I ordered from Sunex the CMT 107 Mount.  The mount is not the perfect fit for this circuit board.  The base of the mount is too big.  There is a little too much plastic on the bottom to fit nicely.  The other two options CMT 103 and CMT 821 have even bigger bases and probably wound not even fit on the board.

Here is the CMT 107 mount.   The first two show unmodified.  The third one beside the circuit board has been modified slightly with small grinder to fit around the surface mounted electronics on the circuit board.  On the right side is the M10 mount and original lens.


The new M12 mount glued on.
 

The CMT 107 mount is also too tall for two Sunex lenses to screw in enough to focus.  The CMT 821 is the right height but would not fit the board.  I used a Dremel to shorten the mount. 

Quick and dirty pan head so I can test the field of view of the lenses.


June 2
Lens cost Field of view Cameras around Max Dimensions image Chromatic Distortion Chromatic Aberration detail comment
IWLAL 120 $24 110° x 83°  5 4200 X 2100 Panorama
DSL219A $49 148° x 111° 4 3108 X 1554 Panorama
The lens test has a second ghost image.
DSL209A $99 160° x 120 4 2884 X 1442 Panorama

The first Chromatic Aberration images are from the panorama.  The second is from the lens test.  I shot a second set of lens test but the camera settings added a whole bunch of sharpening that make them useless.


Working Prototype #1

5 web-cams in a circle using the IWLAL 120 lenses plus one camera with the 219A to fill in the nadir or zenith ( depending which way is made up ).
I Used 1 1/2 inch PVC pipe.  Cut section of pipe off square using a miter box.
wrap a piece of paper around and mark the circumference on it.
Use a ruler to mark 5 points, evenly spaced allow the circumferences.
Transfer the marks to the tube.
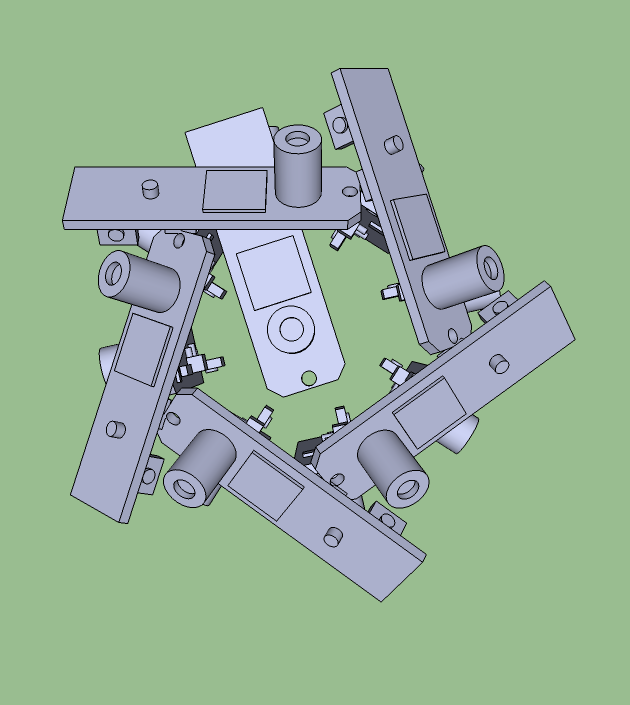
Drill holes into the pipe to attach the cameras so they will weave one behind the other in a circle.   The cameras will be interwoven to attempt to be as close together as possible.
Use a soldering iron to remove the old mounts and glue down the new mounts.  The mounts have been grind down to the least amount of plastic. The left and right edge are slanted to accommodate the curvature of the pipe.
         
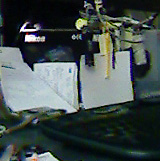
This is what it looks like after drilling out the holes for the lenses and microphone and adding the cameras. A quarter and dime coin to show size.  To get the cameras into the pipe it required grinding down the sides of the circuit board some.  Electric tape is required to cover the circuit board to prevent short circuiting on of the cameras.

Not sure where the NPP is on the lens exactly, but the distance between NPP of the lenses would be about 1 1/4 inches or 3 cm.
With a subject 1 meter away and a 2000 pixel wide pano, the parallax error will be about 11 pixels.  If I did my math right, see Parallax.
 
There were two gaps in between cameras. The cameras were packed too tight into the the pipe that it was impossible to adjust them any to remove the gaps.


Working Prototype #2

Same cameras as #1. Five web-cams around using the IWLAL 120 lenses plus one camera with the 219A to fill in the nadir or zenith ( depending which way is made up ).  This time using a 2" pipe instead of the 1 1/2" pipe.  This allowed enough freedom to adjust each camera to so they were evenly spaced.
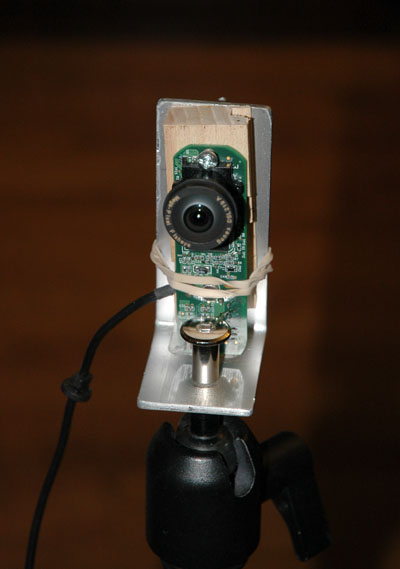
On the tripod with the six cables going down the far side.  The top and bottom caps will be replaced.  The blue one on top is too soft and the camera moves around some.  The bottom one was from a previous experiment. 
There are also 5 holes to capture 5 point sound. 
Not sure where the NPP is on the lens exactly, but the distance between NPP of the lenses would be about 2 inches or 5 cm.
With a subject 1 meter away and a 2000 pixel wide pano, the parallax error will be about 19 pixels.  If I did my math right, see Parallax.
I calculated 11 pixels for the 1 1/2" pipe.   
Denis with the panorama web-cam setup. Tested with all six cameras going to one USB hub and connected to a laptop.  The laptop power was enough to power the hub and five of the cameras, but not enough to power all six cameras.  To power all six cameras the hub must be powered.  To maintain 15 fps while having all 6 cameras connected to a single hub we were limited to 640X480 resolution.  Good thing the ceiling is covered with stucco.  It was very hard to see the holes more than a foot away and very easy to fill in with a little plaster.
Poker video
poker 2009
2000X1000 pixels
13 min, 179 MB

We ran into so many problems processing the footage trying to get smooth video, that this project was forgotten for 6 years. In those years the source footage has gone missing and all that remained was a couple test stitchings.

There were huge color and exposure differences between the cameras. The downward facing camera had such high contrast that you can not read any of the cards. Electric interference caused a periodic tic in the sound recording.

Download and watch the video interactivly using VRPlayer. Watch on a monitor and control with a mouse or on a head mounted display HMD like the Rift.


The images are pulled off the cameras in M-JPEG streams. The next step is to use the info at RAW transfers to get lossless compressed data at higher resolutions.


Page last modified Aug 29, 2014
All content is ©1991-2009 All Rights Reserved.
All trademarks are property of their respective owners.